作为一位经常出入各大博客站点的取经人来说,Markdown 显然已经成为一项必备技能。很多人平时写文档或者博客都会用常见的 Markdown 编辑器,如:有道、Atom、Typora等等。我们经常会有绘图需求,常见的有流程图、类图、序列图和甘特图等等,然而,当你还在苦苦寻找一些免费易用的画图软件时,殊不知 Markdown 早就已经具备了此项功能。
flow 绘图
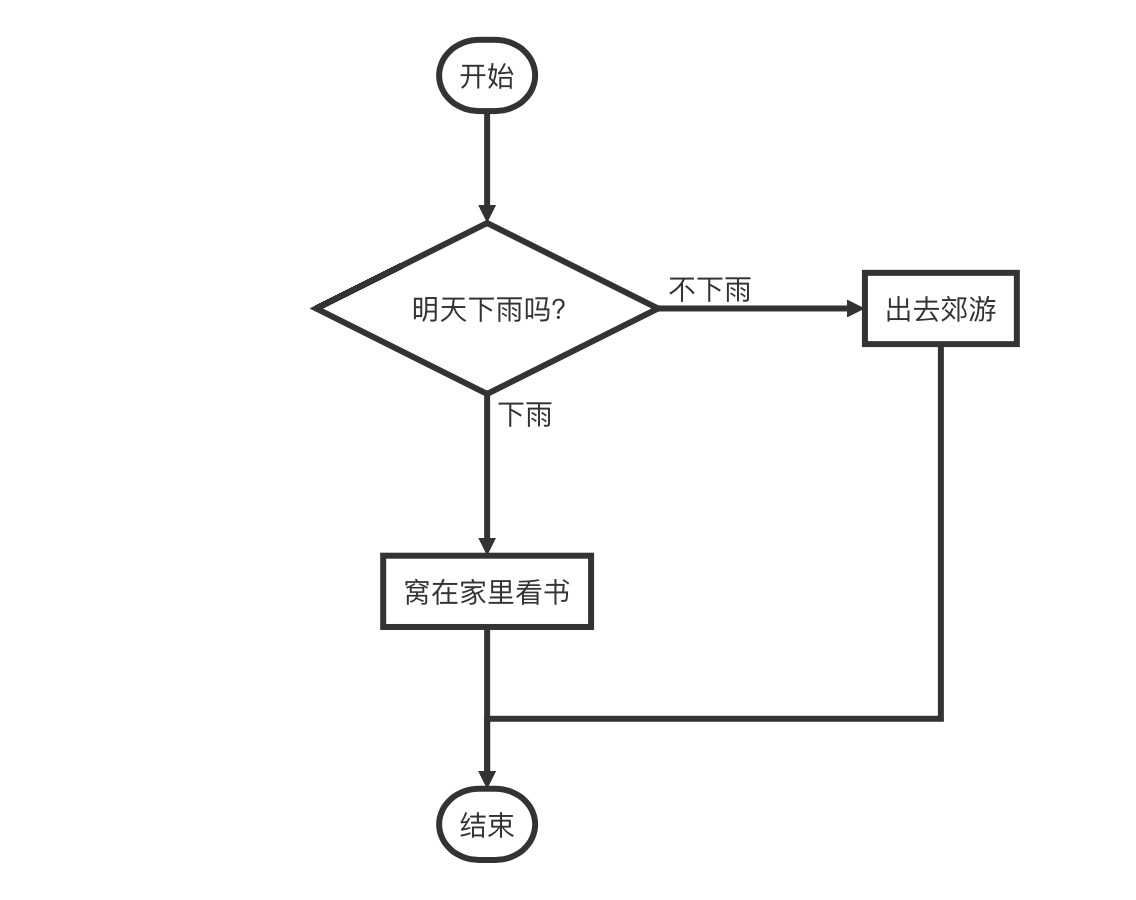
如果我们想按照以下流程绘制一个简单的流程图:
开始 –> 明天下雨吗?–> 不下雨 –> 出去郊游 –> 结束 └──> 下雨 –> 窝在家里看书 –> 结束
通过 Markdown 内嵌的 flow 语法,我们可以很简单地通过下面示例代码实现:
start=>start: 开始
cond=>condition: 明天下雨吗?
outside=>operation: 出去郊游
home=>operation: 窝在家里看书
end=>end: 结束

start->cond
cond(no@不下雨)->outside->end
cond(yes@下雨)->home->end
我们将上面代码拷贝到支持 flow 的 markdown 编辑器里面即可看到下面的流程图,笔者用的是Typora:

其实语法特别简单,可参考下面的基本格式:
nodeName=>nodeType: nodeText[|flowstate][:>urlLink]
- nodeName是流程图中的标签,在第二段连接元素时会用到。名称可以任意,一般为流程的英文缩写和数字的组合,可理解为变量。
- nodeType用来确定标签的类型,=>后面表示类型。由于标签的名称可以任意指定,所以要依赖 type 来确定标签的类型
- 标签常见的几种类型:
start|end|operation|subroutine|condition|inputoutput|parallel - nodeText是流程图文本框中的描述内容,至于: 后面表示内容,中英文均可。特别注意,冒号与文本之间一定要有个空格。
- flowstate 作为可选项,表示当前状态,目前常见的有:
past|current|future|approved|rejected|invalid - urlLink 作为可选项,是一个连接,与框框中的文本相绑定,:> 后面就是对应的 url 链接,点击文本时可以通过链接跳转到 url 指定页面。
官方提供的标准流程图示例:
对应的编码如下所示:
st=>start: Start:>http://www.google.com[blank]
e=>end:>http://www.google.com
op1=>operation: My Operation
sub1=>subroutine: My Subroutine
cond=>condition: Yes
or No?:>http://www.google.com
io=>inputoutput: catch something...
para=>parallel: parallel tasks

st->op1->cond
cond(yes)->io->e
cond(no)->para
para(path1, bottom)->sub1(right)->op1
para(path2, top)->op1
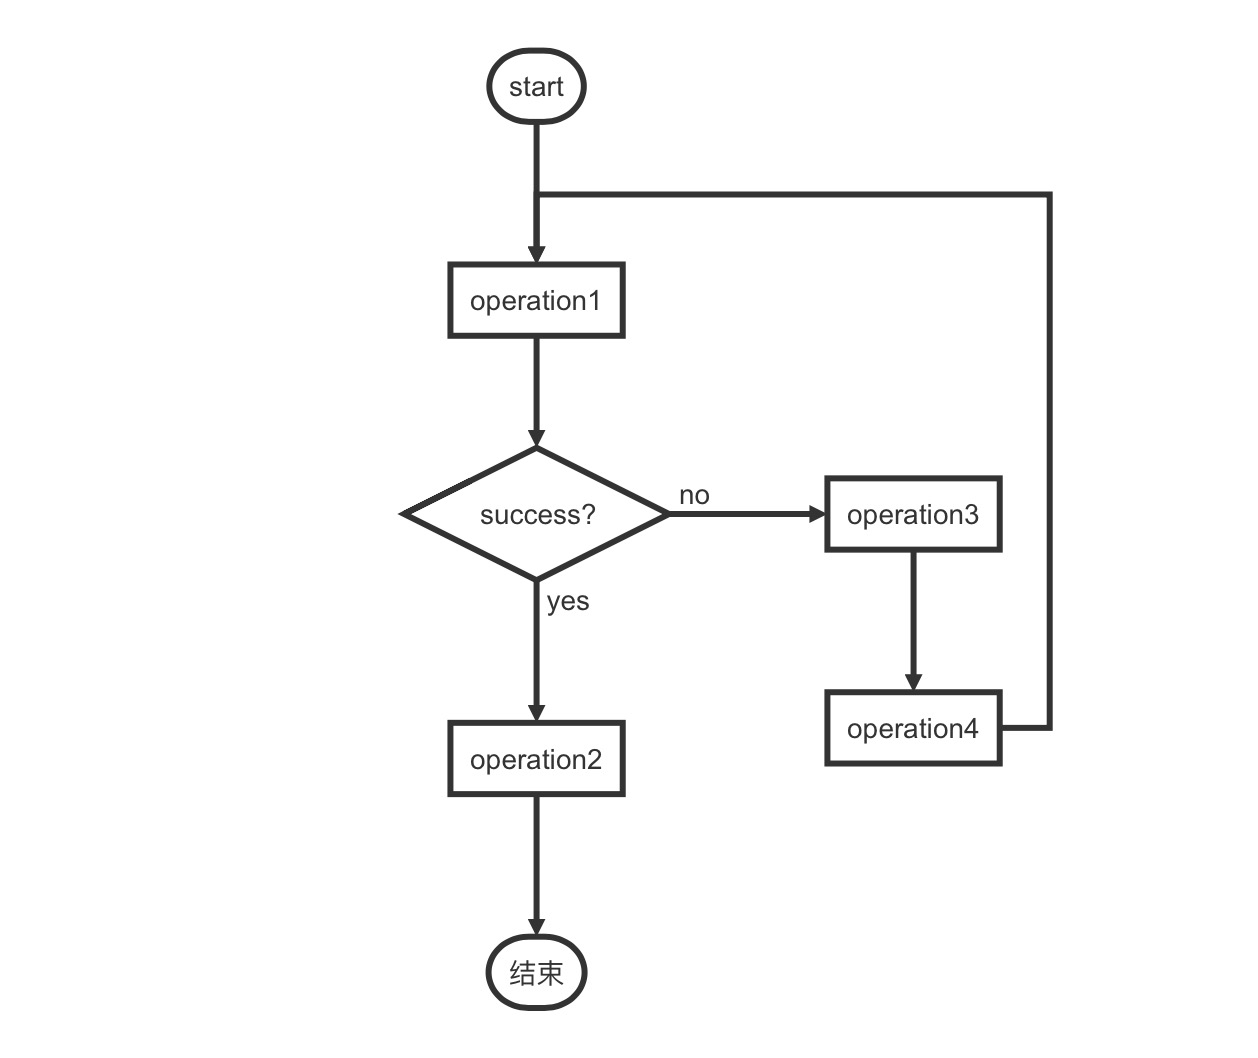
这里值得一提的是,flow 还支持自定义方向,如果在流程图较为复杂的情况下,我们可能会遇到不同节点之间线条冲突重叠的情况,那么这个“自定义方向”对我们来说就比较实用了:
start=>start: start
operation1=>operation: operation1
isSuccess=>condition: success?
operation2=>operation: operation2
operation3=>operation: operation3
operation4=>operation: operation4
end=>end: 结束

start->operation1->isSuccess
isSuccess(yes)->operation2->end
isSuccess(no,right)->operation3->operation4(right)->operation1

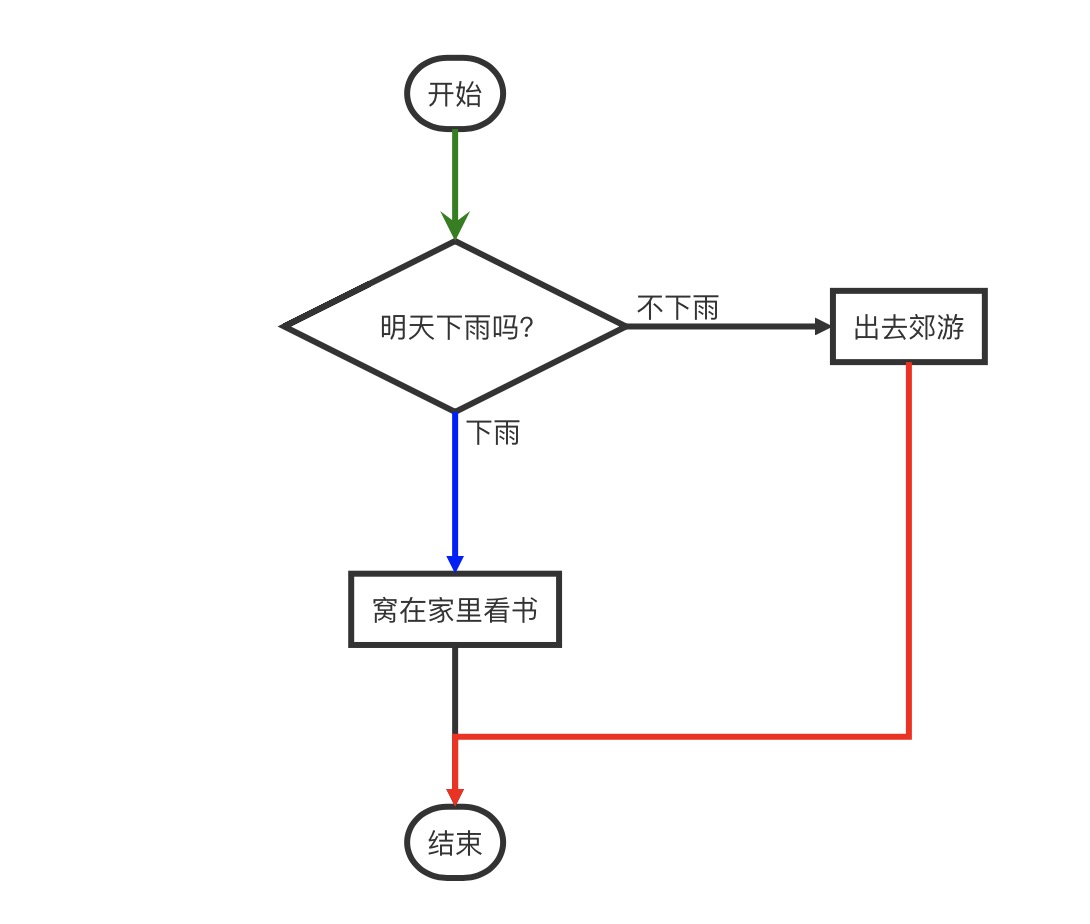
它支持这几种常见的方向属性:left、right、top、bottom。最后,flow 还支持自定义线条样式,例如基于上面的实力流程图,我们加上如下配置:
start=>start: 开始
cond=>condition: 明天下雨吗?
outside=>operation: 出去郊游
home=>operation: 窝在家里看书
end=>end: 结束

start->cond
cond(no@不下雨)->outside->end
cond(yes@下雨)->home->end

start@>cond({"stroke":"Green","stroke-width":3,"arrow-end":"classic-wide-long"})@>home({"stroke":"Blue"})@>outside@>end({"stroke":"Red"})

更多用法可参考官方文档:https://github.com/adrai/flowchart.js
mermaid 绘图
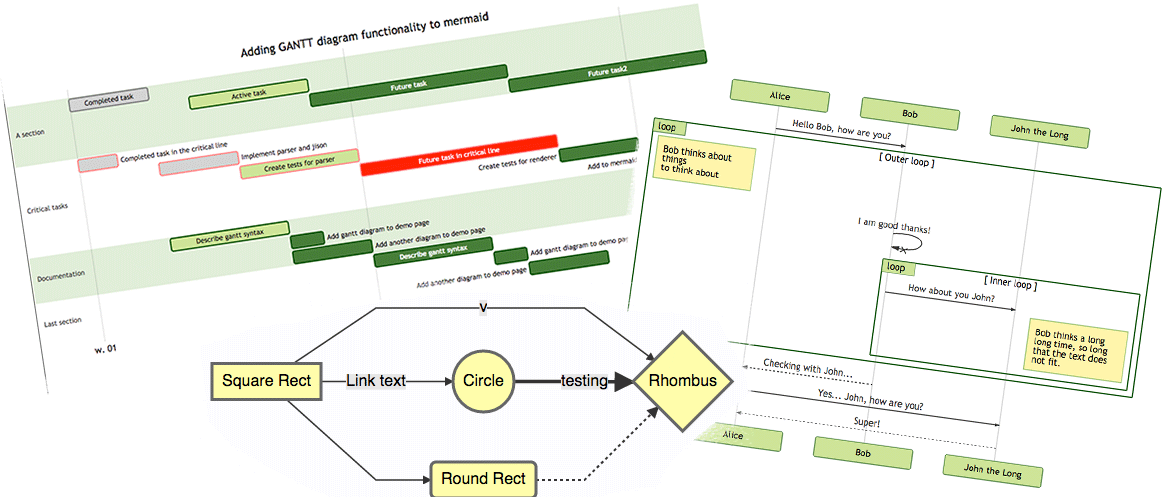
其实,mermaid 和 flow 类似,但它显然比后者更加强大,因为它支持的绘图类型远不止流程图,它还支持类图、序列图、甘特图、饼图等等,可以说是能够涵盖我们日常大部分需求了。只不过就流程图而言,感觉它的视觉效果较为混乱,不够友好,个人还是偏向于使用 flow 来绘制:

这里就不展开介绍了,感兴趣的朋友可以去 mermaid 官网了解一下用法:https://mermaid-js.github.io/mermaid/#/
许可协议: 署名-非商业性使用-禁止演绎 4.0 国际 转载请保留原文链接及作者。
